


Tactical Dog Collar Stitching Guide: Build It Right
Table of Contents
- What You'll Need Before You Start Stitching
- Choosing Your Dog Collar Sewing Pattern
- Preparing and Cutting Your Materials
- How to Sew a Dog Collar: Step-by-Step Process
- Using a Walking Foot Sewing Machine for Webbing
- Testing Seam Strength and Load Capacity
- Inspection and Finishing Your Tactical Dog Collar
- Common Mistakes to Avoid
- Frequently Asked Questions
Last Updated: October 17, 2026
What You'll Need Before You Start Stitching
Building a tactical dog collar that actually holds up demands the right materials from the start. Most DIY attempts fail not because the technique is wrong, but because people skimp on foundational supplies.

The difference between a collar that lasts one season and one that lasts five comes down to material selection, hardware quality, and machine setup. Get these three things right, and your stitching will hold. Cut corners, and no amount of perfect stitching will save you.
Materials: Nylon, Webbing, and Reinforcement
Military-grade nylon is the foundation of any tactical dog collar. This isn't the thin nylon you find in cheap pet store collars. Tactical nylon is dense, tightly woven, and designed to resist tearing and abrasion.
Webbing serves as your structural layer. Heavy-duty nylon webbing (at least 1.5 inches wide) provides the base that holds everything together. Thinner webbing will stretch under load and fail at stress points.
Consider adding a reinforcement layer:
- Bridle leather or latigo for high-wear areas
- Double-layer nylon at attachment points
- Bias tape or binding along edges to prevent fraying
The key is matching materials that won't separate under stress. Mixing incompatible fabrics creates weak points where layers peel apart.
Hardware and Buckles That Won't Fail
Your hardware determines whether the collar holds under real load or snaps when it matters most.
Stainless steel is the minimum standard. Brass fittings corrode and fail. Cheap zinc-plated hardware rusts quickly, especially after washing. Stainless steel costs more upfront but won't degrade after repeated exposure to water and sweat.
Essential hardware components:
- D-rings: Rated for at least 500 pounds of pull. Test them before sewing.
- Buckles: Side-release or heavy-duty plastic buckles rated for tactical use. Avoid flimsy plastic that cracks under pressure.
- Rivets or screws: Stainless steel only. Rivets are permanent; screws allow adjustment but need regular tightening.
Cheap hardware is a false economy. One failed D-ring during a critical moment costs far more than premium hardware ever will.
Tools and Machine Setup
You don't need a fancy setup, but you do need the right tools for the job.
Essential tools:
- Sewing machine capable of handling heavy fabric (not a lightweight model)
- Walking foot attachment for webbing and thick layers
- Heavy-duty thread (bonded nylon or polyester, size 40 or thicker)
- Sharp scissors or rotary cutter
- Measuring tape and marking pen
- Needle in size 16 or 18 for heavy fabric
- Presser foot rated for thick material
A walking foot is non-negotiable. Standard presser feet slip on thick webbing and create uneven stitches. A walking foot feeds fabric evenly from top and bottom, giving you consistent tension and straight lines.
Choosing Your Dog Collar Sewing Pattern
Before cutting a single piece of fabric, you need a solid plan. A tactical dog collar sewing pattern serves as your blueprint. It defines dimensions, stress points, and stitching layout.
The pattern isn't just about size. It's about understanding where forces concentrate and how to reinforce those zones.
Measuring Collar Length and Width for Fit
Start with your dog's neck measurement. Use a soft tape measure and allow one to two fingers of space between the tape and neck for comfort and safety. This prevents chafing and ensures the collar doesn't restrict breathing.
For a tactical collar, add half an inch to your measurement. This gives room for adjustment and accounts for fabric thickness when folded.
Width matters too. A wider collar distributes pressure over a larger area, reducing neck strain. Most tactical collars run 1.5 to 2 inches wide. Narrower collars (under 1 inch) concentrate pressure and increase chafing risk.
Document your measurements:
- Neck circumference (with two-finger space)
- Desired collar width
- Hardware placement (D-ring position, buckle location)
- Reinforcement zones (high-stress areas that need extra layers)
Tactical Collar-Specific Layout and Stress Points
This is where most DIY collars fail. Builders focus on making something that looks good instead of understanding where loads concentrate.
Stress points on a tactical dog collar:
- Attachment points for leash: Where D-rings connect, forces pull hardest
- Buckle area: Where the collar fastens, material flexes repeatedly
- Neck contact zone: Where the collar bears the dog's weight during pulls
- Hardware anchors: Where rivets or screws penetrate fabric
Design your reinforcement around these zones. Place extra stitching rows at D-ring attachments. Add double or triple layers at the buckle. Extend reinforcement 2 inches on either side of any hardware.
A smart tactical collar stitching pattern includes:
- Double-layer webbing at stress points
- Reinforcement stitching (multiple parallel rows) at attachment zones
- Staggered seams so no two seams align vertically
- Sealed or bound edges to prevent fraying under load
Preparing and Cutting Your Materials
Precision at this stage prevents problems later. A collar that's cut crooked or unevenly will never sit right or perform reliably.
Lay out your nylon and webbing on a flat surface. Use a measuring tape and marking pen to draw your pattern.
Cut slowly and straight. A rotary cutter with a ruler gives cleaner edges than scissors. Rough cuts create weak points where stitches can pull through.
For a tactical collar, cut:
- Main webbing layer to your full length measurement
- Nylon facing layer, cut to the same length
- Reinforcement strips (1-2 inches wide) for stress points
- Binding or bias tape for edge finishing
After cutting, seal the edges of nylon to prevent fraying. A lighter held briefly near the cut edge melts the nylon just enough to seal it without burning through.
How to Sew a Dog Collar: Step-by-Step Process
This is where the tactical dog collar stitching guide becomes real. Follow each step precisely. Rushing through any stage undermines the entire build.
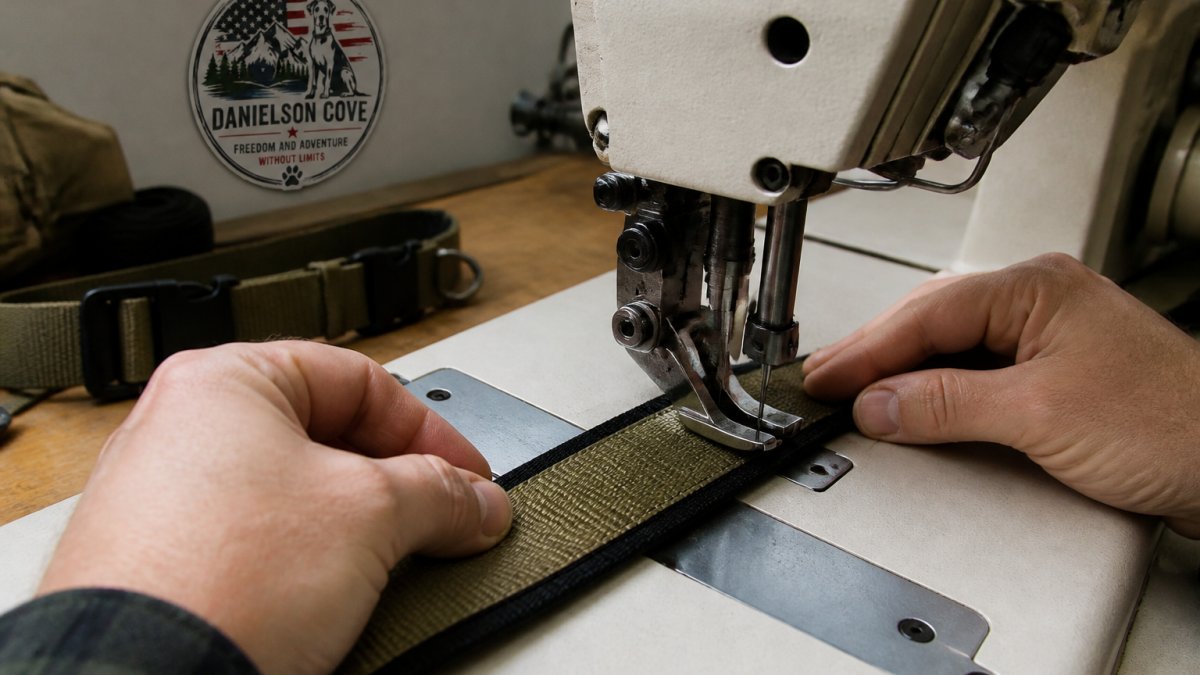
Folding, Pressing, and Basting Stitches
Start by folding your webbing and nylon facing together, right sides facing inward. Press with an iron set to medium heat to create a crisp fold.
Basting stitches hold everything in place before you run the final seams. Use a long stitch length (4-5mm) and thread that contrasts with your fabric so you can see it clearly.
Basting isn't wasted effort. It prevents fabric from shifting during machine sewing and creates a guide for your reinforced stitching.
After basting, check the fit by wrapping the collar around your dog's neck. Make sure the width feels right and the length allows proper adjustment.
Creating Reinforced Dog Collar Stitching
This is the core of a tactical dog collar stitching guide. Reinforced stitching is what separates a collar that holds from one that fails.
Run your first seam along the basting line using a walking foot and heavy-duty thread. Use a medium stitch length (3mm). This creates the basic structure.
Now add reinforcement rows parallel to the first seam:
- Run a second row 1/4 inch away from the first
- Add a third row 1/2 inch from the first
- At stress points, run a fourth row
The multiple parallel rows distribute load across more thread. A single seam concentrates all tension in one line and will eventually break.
At hardware attachment points, stitch in a box or X pattern. This locks the hardware in place and prevents it from rotating or pulling loose.
Using a Walking Foot Sewing Machine for Webbing
A walking foot is essential for tactical dog collar stitching. Without it, your machine will skip stitches or create uneven seams on thick webbing.
A walking foot moves the top layer of fabric at the same speed as the feed dogs move the bottom layer. This prevents the top layer from shifting, which is what causes slipped stitches and puckering.
Machine Settings and Troubleshooting
Thread tension is critical. Set it to medium (around 5-6 on most machines). Too loose, and stitches won't hold. Too tight, and thread breaks or fabric puckers.
Use heavy-duty thread rated for thick fabrics. Bonded nylon thread is ideal, it's strong and resists fraying. Polyester thread works but isn't quite as durable.
Needle size matters. A size 16 or 18 needle penetrates thick webbing without bending or breaking. Smaller needles will snap.
Common issues and fixes:
- Skipped stitches: Check needle size, thread quality, and walking foot alignment. Replace the needle.
- Thread breaks: Reduce tension slightly. Check that thread is feeding smoothly through guides.
- Puckering: Lower tension, slow your sewing speed, and ensure the walking foot is engaged.
- Uneven stitches: Make sure fabric is feeding evenly. Adjust walking foot pressure if your machine allows it.
Test your setup on scrap fabric before starting the collar. Run a few inches of stitching and check that seams are straight and even.
Testing Seam Strength and Load Capacity
A collar that looks good but fails under load is worthless. Test your seams before declaring the collar finished.
The most basic test: grab the collar with both hands and pull hard. Really hard. A properly stitched tactical dog collar should not tear. The fabric might stretch slightly, but stitches should hold.
For more rigorous testing, use a pull scale if you have access to one. Hang the collar from a sturdy point and attach weights gradually until stitches fail.
Check seams visually for:
- Broken or loose threads
- Puckering or bunching
- Gaps between layers
- Hardware that rotates or shifts
If any seam fails testing, reinforce it with additional stitching before using the collar.
Inspection and Finishing Your Tactical Dog Collar
Before your dog wears the collar, inspect every detail.
Check that all hardware is secure:
- D-rings don't rotate
- Buckles are tight and functional
- Rivets or screws haven't loosened
Trim any loose threads. Seal the cut ends with a lighter to prevent fraying (do this carefully to avoid burning the fabric).
Try the collar on your dog. It should sit snug but comfortable. You should fit one to two fingers between the collar and neck. Adjust the fit if needed.
A well-built tactical dog collar from Danielson Cove or a quality DIY build should last years with proper care. Machine wash on a gentle cycle or hand wash with mild soap.
Common Mistakes to Avoid
Most failed collars share the same problems. Learn from others' mistakes.
Mistake 1: Using thin webbing. Thin webbing stretches and tears easily.
Mistake 3: Using cheap hardware. Corroded or weak hardware fails first.
Mistake 4: Inadequate stitching. A single seam row isn't enough.
Mistake 6: Skipping edge sealing. Raw nylon edges fray and weaken under stress.
Mistake 7: Not testing before use. Pull-test your collar before trusting it with your dog.
Building a tactical dog collar that holds up demands patience and precision.
The collars we build at Danielson Cove are designed with this exact process in mind. Our Nylon Tactical Dog Collar uses military-grade nylon with reinforced stitching and rust-resistant hardware.
Every collar we sell supports Daisy's Dane Sanctuary, a Great Dane rescue near Kansas City.
Frequently Asked Questions
What stitch pattern is best for tactical dog collar stitching?
A double-pass box stitch with X-reinforcement at stress points, where the collar attaches to the D-ring and buckle, distributes load evenly and prevents seam failure under pull. Start with a straight stitch at 2.5mm length, then backstitch the same line. For tactical collars, add a perpendicular X-stitch across the box to reinforce high-stress zones. This pattern handles the repeated tension of active outdoor use better than single-pass stitching.
Can a regular sewing machine handle tactical dog collar webbing?
A regular machine can sew webbing, but a walking foot makes the difference. Walking feet feed thick, slippery materials evenly without puckering or slipping. Military-grade nylon and reinforced webbing create friction that standard presser feet struggle with. If you don't have a walking foot, use a heavy-duty needle (size 16 or 18), reduce speed, and backstitch every seam. A walking foot is worth the investment for consistent, durable results.
How do you know if your tactical dog collar stitching will hold up?
Inspect the collar before use: check that thread runs straight without puckers, seams sit flat, and knots are buried inside the collar. Test load by applying steady pull pressure to stress points, the collar should not separate or tear. Look for gaps between layers or loose thread ends. After each use, examine seams for fraying or separation. A well-stitched tactical collar shows no visible damage after moderate pulling; poor stitching unravels or splits at stress points within days.
What materials work best for a durable tactical dog collar?
Military-grade nylon with reinforced webbing and rust-resistant hardware is the standard for tactical collars. Nylon resists water, mud, and UV damage, critical for backcountry trips. Layer nylon with bridle leather or latigo for added durability at stress points. Pair these materials with stainless steel or brass hardware; avoid plated hardware that corrodes under sweat and moisture.