


How to Train Your Dog to Wear a Hiking Harness
Last Updated: October 30, 2026
Quick Summary
Train a hiking harness at home first, in short, happy sessions of three to five minutes. Start by letting your dog sniff the harness, then build step by step through touch, the front loop, buckles, and short wear indoors. Advance only when your dog stays relaxed.
- Keep each training session to three to five minutes, no more than two per day.
- Advance only when your dog stays relaxed at the current step for two sessions in a row.
- Reward during the behavior, not only after it, to build a positive association.
- Fasten the buckles, reward, and unfasten within five seconds to make the click predict a treat.
- Once the harness feels calm indoors, practice loose-leash walking separately from harness acceptance.
Table of Contents
- Why Harness Training Comes Before the Trail
- Choosing a Hiking Harness That Fits Your Dog
- Helping a Dog Afraid of Harness Work Past Its Fear
- Positive Reinforcement Harness Training, Step by Step
- How to Put a Harness on a Dog Without Stress
- Troubleshooting Freezing, Backing Away, and Pulling
- Getting Your Dog Trail Ready in a Harness
- Frequently Asked Questions
Why Harness Training Comes Before the Trail
Most dogs can learn to wear a hiking harness, but the ones who do it well are the ones who learned it at home first.
Think of the harness as a new habit, not a new rule. Your dog needs to feel that the harness means good things are coming.
Harness training also gives you a clear picture of your dog's comfort.
Choosing a Hiking Harness That Fits Your Dog
A good hiking harness should fit snugly without pinching. Measure your dog's chest at the widest point, just behind the front legs. Learn how to fit a tactical dog harness properly before you compare sizes.
Look for these features:
- Adjustable straps at the chest and belly
- Padded areas where the harness touches the body
- A handle on the back for lifting or steady control
- Attachment points that sit high on the back, away from the spine
The Adjustable Tactical Dog Harness for Hiking and Training is built for large breeds like Great Danes and German Shepherds. Browse the adjustable hiking and training harness to see its full feature set.

Watch out: A harness that fits when your dog is standing still can rub when your dog moves. Check the fit again after a five-minute walk.
Helping a Dog Afraid of Harness Work Past Its Fear
Fear of the harness is not one problem, it is usually one of three, and each needs a different response. Read which one you have before you change the plan.
- Object fear: the dog backs away, hides, or leaves the room when the harness appears. The harness itself is the trigger.
- Handling fear: the dog is fine with the harness on the floor but stiffens, ducks, or pulls away when you reach for the chest or lift a leg.
- Restraint fear: the dog accepts the harness but freezes or panics once it is buckled, especially around the chest or behind the front legs.
A common approach to these fears is counter-conditioning. You pair the scary thing (the harness, the reach, the buckle) with something the dog already loves, and you keep the scary part small enough that the dog stays under its threshold, still able to eat, look at you, and move normally.
A fear ladder you can actually follow
Work one rung at a time and only climb when the dog is relaxed at the current rung across two separate sessions.
- Harness in the room, on the floor. Reward any calm look toward it. Do not put treats on it yet.
- Harness near the food bowl. Feed meals a few feet away, then closer over several days.
- Sniff and target. Reward a nose touch to the harness. This gives the dog a job instead of a threat.
- Harness touched to the chest, not fastened. One second of contact, then treat, then remove.
- Front loop over the head, no buckles. Two seconds, treat, remove.
- Buckles fastened, immediately undone. Reward during, not only after.
- Fastened and worn for 10-30 seconds indoors. Then build duration.
If the dog stalls at any rung, drop back one rung for two sessions rather than pushing through. A dog that hides from the harness is telling you rung 1 was skipped, not that the dog is stubborn.
What not to do
Do not lure a fearful dog into the harness with a treat held through the neck opening. It works once and then the dog learns the harness predicts being trapped. Do not tighten straps to stop a dog from backing out, as overly tight straps can cause chafing on a long hike. Do not pick up a small or medium dog and push its legs through; lift-and-hold is a restraint experience, and it sets back handling trust for weeks.
For dogs with a rough history, rescues, dogs rehomed after a collar or leash incident, expect the ladder to take two to four times as long, and run sessions at the same time each day so the harness becomes predictable. Predictability does more for a fearful dog than any single treat.
Positive Reinforcement Harness Training, Step by Step
A day number is a guide, not a deadline. The real rule is this: advance when your dog is relaxed at the current step for two sessions in a row, repeat when your dog is merely tolerant, and pause when your dog shows stress signals. Progress through the plan below varies with each dog; sensitive or rescue dogs often need more time, and that is normal.
How to run a single session
Keep every session to three to five minutes, and run no more than two sessions a day. A session has four parts:
Adjustable Tactical Dog Harness for Hiking and Training →
- Set up, harness on the floor, treats in a pouch, dog in a low-distraction room.
- One target behavior, sniff, touch, wear, or buckle, but only one per session.
- Mark and reward, mark the instant the dog does the thing (a clicker or a calm "yes"), then treat. Reward during the behavior, not only after.
- End on a win, stop while the dog is still succeeding, even if that means stopping after 30 seconds.
Use pea-sized treats and count them. Ten to fifteen rewards per session is a reasonable target.
The progression
- Sessions 1-2, Sniff and target. Harness on the floor. Reward any deliberate sniff or nose touch. No lifting, no buckling.
- Sessions 3-4, Contact. Touch the harness to the chest for one second, reward, remove. Then rest the front loop near the neck without going over the head.
- Sessions 5-6, Front loop on. Slip the front loop over the head, reward, remove immediately. Two to three repetitions per session.
- Sessions 7-8, Buckles. Fasten the buckles, reward, unfasten within five seconds. The goal is that the click of the buckle predicts a treat.
- Sessions 9-11, Duration indoors. Fasten and leave on for 30 seconds, then one minute, then two minutes. Reward calm standing, not just the act of putting it on.
- Sessions 12-14, Movement indoors. With the harness on, ask for a few steps, a sit, and a treat scatter. This is where most dogs decide the harness is fine.
When to advance, repeat, or pause
- Advance when the dog offers the behavior willingly and stays loose, soft eyes, relaxed tail, normal eating.
- Repeat when the dog complies but looks stiff or takes treats slowly. One more session at the same rung usually fixes it.
- Pause when the dog refuses treats, freezes, or backs away. Drop back one rung and rebuild for two sessions before trying again.
Separating harness acceptance from hiking skills
Wearing the harness and hiking in the harness are two different skills, and the plan above only teaches the first. Once your dog wears the harness calmly indoors, start layering the trail skills separately: loose-leash walking, a solid recall, and comfort with uneven footing. Do not try to teach leash manners and harness acceptance in the same session, split the goals so a bad leash moment does not poison the harness.
A calm dog standing on a living room rug while its owner kneels beside it holding a treat near a harness laid on the floor.
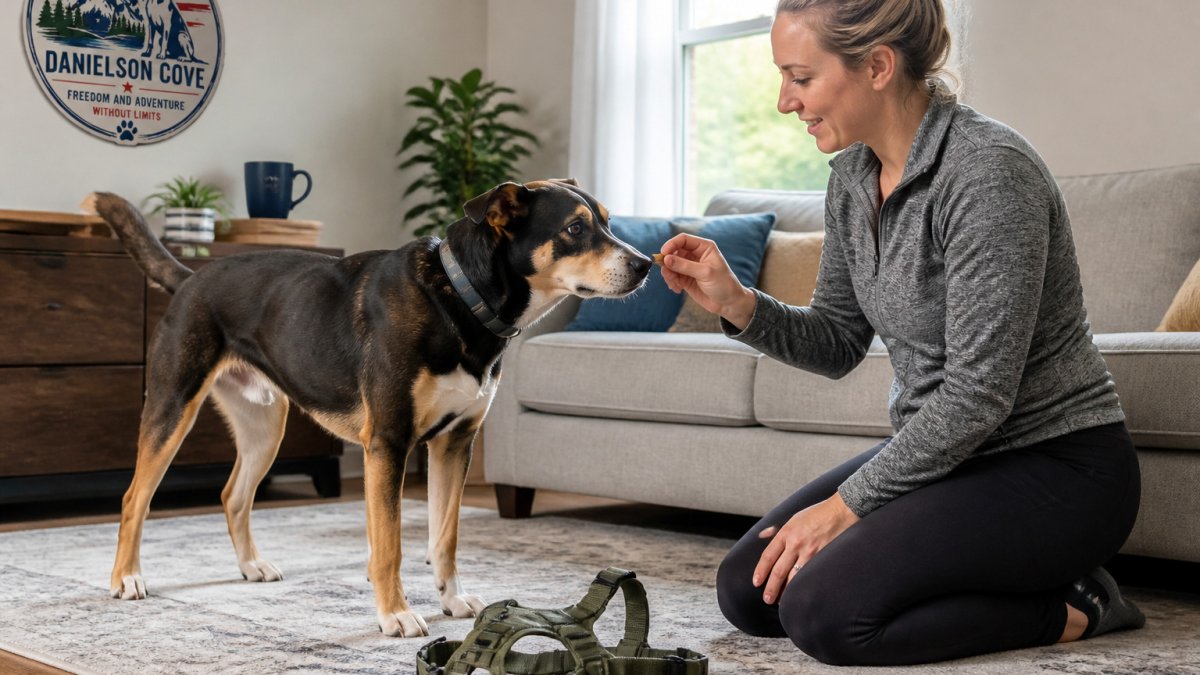
The table below summarises the session-by-session progression so you can see at a glance what each stage asks of your dog.
| Sessions | Step | Goal |
|---|---|---|
| 1-2 | Sniff and target | Reward a deliberate sniff or nose touch |
| 3-4 | Contact | Touch harness to chest for one second |
| 5-6 | Front loop on | Slip loop over head, remove immediately |
| 7-8 | Buckles | Fasten, reward, unfasten within five seconds |
| 9-11 | Duration indoors | Build from 30 seconds to two minutes |
| 12-14 | Movement indoors | A few steps, a sit, a treat scatter |
| 15+ | Leash and doorway | Clip leash, walk to door and back |
How to Put a Harness on a Dog Without Stress
Putting on a harness should take less than 30 seconds. Hold the harness open and let your dog step into the front loop first.
Keep these tips in mind:
- Use one hand to support the chest while you buckle.
- Keep your movements slow and quiet.
- Never yank the harness over the ears.
- Reward your dog right after the last buckle clicks.
The Dog Breathable Harness has quick-release buckles that make on-and-off easy. Its lightweight mesh construction promotes airflow during runs, hikes, and training sessions. You can read the guide to preventing harness chafing if your dog has sensitive skin.
Troubleshooting Freezing, Backing Away, and Pulling
Freezing usually means your dog feels unsure. Back up one step in your training plan and reward any movement toward you.
Pulling on the leash is a different problem. It usually comes from excitement or from a dog that has not learned loose-leash walking yet.
Common mistakes include:
- Rushing to the next step before your dog is ready
- Rewarding only at the end of a long session
- Tightening the harness to stop a dog from backing out
If your dog keeps freezing or trying to escape the harness after a week of short sessions, pause training.
Getting Your Dog Trail Ready in a Harness
Once your dog wears the harness calmly at home, practice outdoors. Start with a quiet neighborhood walk, then move to an easy trail. Watch your dog's body language as you go. A relaxed tail and loose body mean your dog is comfortable.
Before every hike, check these items:
- Harness fits snugly with two fingers under the straps
- Buckles are secure and clips are closed
- No rubbing or red spots after the last walk
- Leash attaches to the back or front ring as the harness allows
For longer outings, plan for rest stops and water breaks. You can also explore the adventure kit options for active dogs when you plan your trips.
Frequently Asked Questions
How do I get my dog used to wearing a hiking harness?
Start by letting your dog sniff the harness on the floor, then pair it with treats. Once the dog approaches it willingly, slip it over the head for a second, reward, and remove it. Increase wearing time in short sessions over several days, always ending before the dog shows stress. Consistency matters more than speed, so keep sessions brief and positive.
How long does it take for a dog to get comfortable wearing a harness?
Most dogs need several days to a few weeks of short, regular practice before they stop reacting to a harness. Timelines vary with age, past experiences and temperament. Puppies and confident dogs often adapt faster, while rescue dogs or anxious dogs may need more patience. Judge progress by relaxed body language, not by the calendar.
How do I put a harness on a dog that is afraid of it?
Skip forcing the harness on. Begin by rewarding the dog for looking at and touching the harness, then for standing still while it is placed near the body. Fasten only once the dog is calm, and unbuckle quickly if fear rises. If the fear is intense or escalates, a professional trainer can help build the process more slowly.
Should my dog wear a harness around the house before hiking?
Yes. Wearing the harness indoors lets your dog learn that it means something pleasant without the distractions of a trail. Practice short wear sessions at home, paired with praise or treats, before adding leash walks. Trail readiness comes after the dog tolerates the harness calmly for longer periods.
