


How to Patch Holes in Backpacks: 5 Repair Methods
Table of Contents
- How to Patch Holes in Backpacks: Match the Fix to the Damage
- What You'll Need Before You Start
- Step 1: Assess the Hole, Tear, or Worn Area
- Step 2: How to Sew a Hole in a Backpack
- Step 3: How to Attach a Patch to a Backpack
- Step 4: Best Glue for Backpack Patches (and When to Use It)
- Step 5: Backpack Repair Tape for Fast Field Fixes
- Waterproof and Coated Fabric: What Changes
- Frequently Asked Questions
Last Updated: October 7, 2026
How to Patch Holes in Backpacks: Match the Fix to the Damage
A hole in your pack never shows up at a good time. Learning how to patch holes in backpacks comes down to one skill: matching the repair to the damage.
At Danielson Cove, we build gear for people who take it into the backcountry and expect it to come home. That same standard applies to repairs. You do not need a sewing machine or a gear lab, just a needle, thread, patch material, and about 20 minutes.
What You'll Need Before You Start
Gather your supplies first. A basic repair kit covers almost every job:
- Needles: a heavy-duty or upholstery needle, sized for thick fabric
- Thread: bonded nylon or polyester, not cotton
- Patch material: nylon fabric, Tenacious Tape, or iron-on patch
- Scissors: small, sharp, for trimming
- Fabric glue: flexible, waterproof, for coated fabrics
- Seam ripper or tweezers: for pulling loose threads
- A lighter: to melt-seal cut nylon edges
- Rubbing alcohol and a cloth: to clean the repair area
Skip cotton thread entirely. It rots, stretches, and snaps under load. Bonded nylon is what most pack makers use, and it holds up to sun and rain.
Step 1: Assess the Hole, Tear, or Worn Area
Look at the damage before you touch it. Hole size, fabric type, and location decide your method.
Ask three questions:
- How big is it? Under an inch usually takes a patch. Over two inches may need stitching plus a patch.
- What fabric is it? Uncoated nylon sews and glues well. Coated or waterproof fabric needs adhesive, not heat.
- Where is it? Bottom panels, strap anchors, and load-bearing seams carry weight. A pocket or lid does not.
Stop the Damage From Spreading
A hole grows. Every time you stuff the pack, the edges fray and the tear creeps wider. Trim loose threads with scissors, then run a flame quickly along the cut edge of nylon to melt-seal it. A quick pass is enough, this prevents most small tears from turning into big ones.
Step 2: How to Sew a Hole in a Backpack
Sewing is the strongest fix for uncoated nylon and load-bearing areas, and it holds under real weight. But on coated or waterproof fabric, every stitch punches a pinhole through the coating, and on a panel that sees rain, those holes wick water. Match the method to the fabric before you thread a needle.
Thread, Needle, and Stitch by Fabric
| Fabric | Thread | Needle | Stitch |
|---|---|---|---|
| Lightweight nylon (ripstop, 210D) | Bonded nylon, size 69 | Sharp, size 12-14 | Zigzag or running |
| Midweight nylon (420D-500D) | Bonded nylon, size 69 | Sharp or heavy-duty, size 14-16 | Zigzag |
| Heavy nylon or Cordura (1000D) | Bonded nylon, size 92 | Heavy-duty or upholstery, size 16-18 | Zigzag or overcast |
| Webbing (strap anchors) | Bonded nylon, size 92 | Heavy-duty, size 18 | Box-X or overcast |
| Coated / waterproof | , | , | Skip sewing; use adhesive or tape |
Skip cotton thread entirely. It rots, stretches, and snaps under load. Bonded nylon is what most pack makers use. Polyester is a fine second choice, slightly less stretch, better UV resistance.
The Stitches That Hold
Zigzag stitch: The workhorse for tears. It spreads stress across the fabric instead of pulling on one line, so the repair flexes with the pack rather than tearing out.
Overcast stitch: For a torn seam or raw edge.
Box-X stitch: For strap anchors and webbing. Stitch a rectangle, then an X through the middle.
Backstitch: Not a repair stitch on its own, but the lock at the start and end of every repair. Three backstitches at each end keep the repair from unraveling.
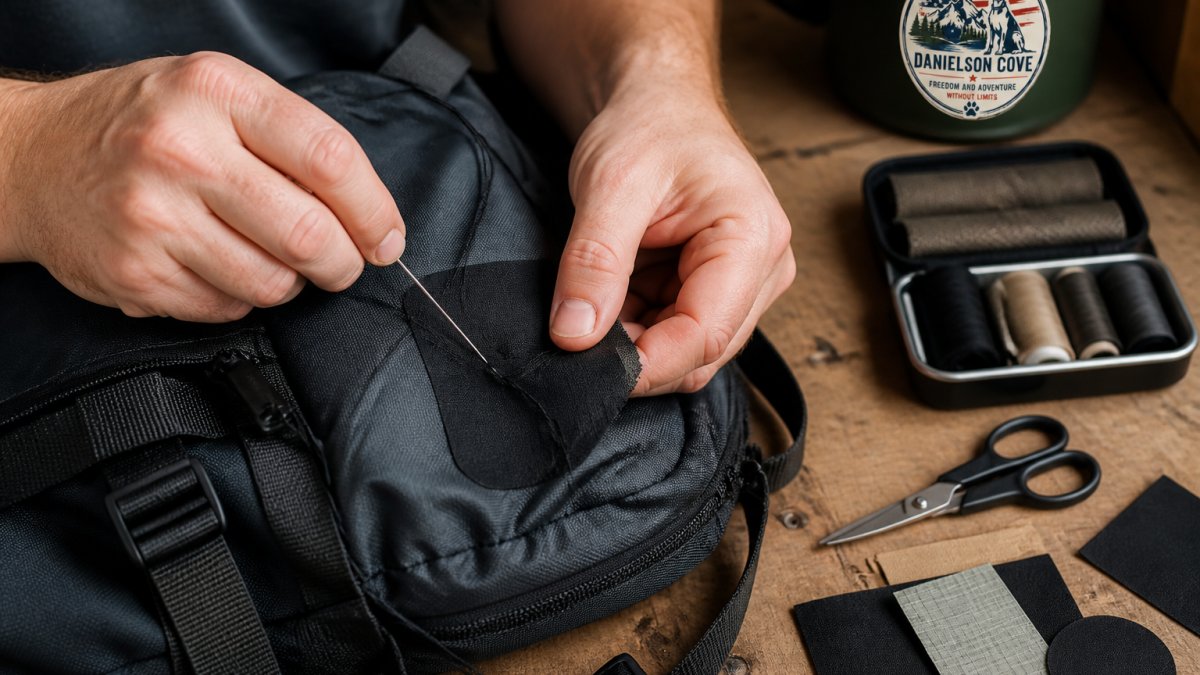
Step-by-Step: Sewing a Tear Closed
Thread your needle with a double strand of bonded nylon and knot the end. Work from the inside of the pack if you can reach it.
- Bring the needle up through one side of the tear, about 1/8 inch from the edge.
- Push it down through the other side, directly across.
- Repeat in a zigzag pattern, catching both edges each pass.
- Pull each stitch snug but not tight enough to pucker the fabric.
- Finish with three backstitches and a knot on the inside.
- If the fabric is coated, seal the stitch line with seam sealer or a strip of repair tape.
When Sewing Is the Wrong Choice
Sewing is the wrong method when:
- The fabric is coated or waterproof and the panel sees rain
- The hole is in a spot a needle cannot reach without disassembling the pack
- The damage is a worn-through area rather than a clean tear, stitching a frayed edge just pulls the fray wider
In those cases, repair tape or flexible urethane adhesive is the better call. For load-bearing seams and strap attachment points, stitch first, then back the repair with a patch and seal the stitch line. If the webbing itself is torn through, take it to a professional gear repair shop.
A patched pack is a pack that keeps going. At Danielson Cove, we build gear with reinforced stitching and durable materials so it holds up trip after trip, and we donate 15% of all profits to Daisy's Dane Sanctuary, a Great Dane rescue near Kansas City, Missouri. Caring for the gear that carries you is part of caring for the adventures ahead.
Step 3: How to Attach a Patch to a Backpack
A patch covers damage too wide to stitch closed. How to attach a patch to a backpack depends on the patch type: iron-on, adhesive, or sew-on.
- Iron-on patch: place it over the damage, cover with a cloth, and press with a medium iron. No steam.
- Adhesive patch: peel, press firmly, and let it cure for 24 hours before loading the pack.
- Sew-on patch: stitch around all four edges with a zigzag or overcast stitch.
For heavy loads, sew the patch on even if it is iron-on. Heat activation alone can lift at the corners over time.
Step 4: Best Glue for Backpack Patches (and When to Use It)
The best glue for backpack patches is a flexible, waterproof urethane-based fabric adhesive. It bonds to nylon, coated fabric, and webbing, and it stays flexible in cold weather.
Use glue when:
- The fabric is coated or waterproof and cannot take heat
- The hole sits in a spot a needle cannot reach
- You want a fast fix without stitching
Clean the area with rubbing alcohol first. Glue will not bond to dirt, oil, or old residue. Apply a thin layer, press the patch down, and weight it overnight. Full cure takes about 24 hours.
Glue is weaker than stitching on load-bearing seams. For strap anchors and bottom panels, stitch first, then seal the edges with glue.
Step 5: Backpack Repair Tape for Fast Field Fixes
Backpack repair tape is the fastest option and the one to keep in your pack. It sticks to most fabrics, needs no tools, and takes seconds to apply. Press it over the damage, smooth out air bubbles, and go. Tenacious Tape and similar nylon-backed tapes handle rain and abrasion well.
Repair tape works best on:
- Small punctures and slices
- Rain flies and tent-style panels
- Emergency fixes until you get home
It is not a permanent fix on high-wear areas like the bottom panel, tape edges lift over time with repeated stuffing and abrasion.
Waterproof and Coated Fabric: What Changes
Coated and waterproof fabrics change the rules because the coating, not the fabric, keeps water out. Polyurethane (PU), polyvinyl chloride (PVC), and silicone coatings sit on the back of the nylon or polyester face fabric. Puncture that coating with a needle, melt it with an iron, or dissolve it with the wrong solvent, and the panel loses its water resistance even if the fabric is intact. That is why the standard advice to "iron on a patch" or "sew it shut" can quietly ruin a waterproof pack. Here is what each method does to a coating:
- Iron-on patches: Medium heat softens and can bubble PU coatings. Silicone coatings tolerate less heat than PU. If you must use heat, test on an inside seam allowance first, use the lowest effective setting, and press through a cloth.
- Needles: Every stitch punches a line of pinholes through the coating. On a lid or pocket that is fine; on a panel that sees rain, those holes wick water.
- Flame sealing: Never. A flame that melts a raw nylon edge will melt, char, or ignite a coating.
- Solvent-based glue: Some solvents attack PU. Look for a flexible urethane adhesive labeled for coated fabrics, and test a dime-sized spot on an inconspicuous area first.
Matching the Method to the Coating
| Damage | Fabric / Coating | Best Method | Why |
|---|---|---|---|
| Small puncture | PU- or silicone-coated nylon | Repair tape | No heat, no needle holes, bonds to the coating |
| Long tear | Uncoated nylon | Zigzag stitch | Holds under load, no coating to protect |
| Worn corner | Any | Sew-on patch | Covers a wide area, stitches distribute stress |
| Torn strap anchor | Webbing | Stitch plus glue | Carries real weight, glue seals the stitch line |
| Seam split | Coated fabric | Fabric glue or tape | Keeps the coating intact, no pinholes |
| Pinhole leak after stitching | Any coated panel | Seam sealer or tape over stitches | Restores the water barrier |
Sealing the Stitch Line
If you do stitch a coated panel, treat the repair like a seam. A stitched hole lets water in through the needle holes, and on a pack that sees sustained rain, that trickle matters. Two options:
- Seam sealer: A thin bead of flexible urethane seam sealer worked into the stitch line with a fingertip or small brush. Let it cure per the label.
- Repair tape over the stitches: A strip of nylon-backed tape pressed over the finished repair. Faster, but tape edges lift over time on high-wear panels.
Structural Repairs Deserve a Different Standard
Cosmetic holes in a lid or pocket and structural failures at load-bearing seams and strap attachment points are not the same job. Strap anchors, haul loops, and the seam where the shoulder straps meet the body carry the pack's weight.
For those spots, stitch through the webbing and the pack body with bonded nylon, back the repair with a patch for reinforcement, then seal the stitch line.
A patched pack is a pack that keeps going.
Frequently Asked Questions
How can I repair a hole in my backpack?
Match the method to the damage. Small nicks under 1 inch get backpack repair tape or fabric glue. Tears over 1 inch on load-bearing areas like straps or the bottom panel need hand stitching with doubled thread plus a patch. For coated or waterproof fabric, use an iron-on patch at low heat or a peel-and-stick patch, since standard glue may not bond to the coating.
What is the best glue for backpack patches?
Flexible fabric adhesives or urethane-based gear cement work best because they bend with the pack instead of cracking. Avoid rigid cyanoacrylate glues, which fail on nylon and coated fabric. Clean the area with isopropyl alcohol first, apply a thin layer, press the patch down, and let it cure fully, usually 24 hours, before loading the pack.
Can you use an iron-on patch on a backpack?
Yes, on most nylon and polyester packs, but heat is the risk. Set the iron to low, place a cotton cloth or pressing sheet between the iron and the patch, and press for 20 to 30 seconds. Coated or waterproof fabric can delaminate under high heat, so test a hidden spot first or use a hairdryer on low instead of a direct iron.
How do you stop a backpack hole from fraying?
Trim loose threads with sharp scissors, then seal the raw edge before patching. Run a line of fabric glue or a row of overcast stitches along the cut edge. For nylon, a brief pass with a lighter along the frayed edge melts the fibers and stops runs, but keep the flame away from coated fabric and never leave it unattended.