


How to Pack for Remote Wilderness Trips: 2026 Guide
Table of Contents
- Start With Weight, Volume, and Trip Length Before You Pack Anything
- Backcountry Camping Essentials for Remote Terrain
- How to Pack a Backpack for Hiking Without Hot Spots
- Your Multi-Day Hiking Packing List, Built by Category
- Food and Water Math for Days Without Resupply
- Wilderness First Aid Kit Checklist and Emergency Communication
- Conclusion: Test Your Load Before the Trailhead
- Frequently Asked Questions
Last Updated: October 12, 2026
Start With Weight, Volume, and Trip Length Before You Pack Anything
Most people pack for remote wilderness trips by grabbing gear first and worrying about weight later.
A useful starting point comes from Hike Bike Travel's remote backpacking packing list, which suggests keeping your loaded pack under roughly a quarter to a third of your body weight.
Before you touch a single item, answer three questions: how many days until my next resupply, what's my total pack weight target, and how much volume does that weight take up.
Set a Pack Weight Target Based on Your Body Weight
Start with 25 to 30 percent of your body weight as an upper bound, then subtract for fitness and terrain. Steep, rough ground punishes a heavy pack far more than flat trail does. If you're new to remote trips, aim for the low end and add weight only after a shakedown hike.
Match Volume to Days Without Resupply
Volume matters as much as weight. Food and fuel take up space even when they're light, and a pack that carries a weekend load comfortably can feel stuffed on day four of a no-resupply trip. Compare your pack's listed capacity against a realistic food and water volume estimate before you commit.
Backcountry Camping Essentials for Remote Terrain
Remote terrain changes what counts as essential.
Shelter is your first line of defense.
Your sleep system has three parts: sleeping bag, sleeping pad, and a liner if you run cold.
Then there's the repair kit, the part most people skip, and the part that saves trips.
- Tent pole splint or repair sleeve
- Patch kit for your pad or tent fabric
- Spare buckle or cord for pack straps
A compact survival and safety kit earns its place here too.

Shelter, Sleep System, and Repair Kit
Test your shelter before you leave. Pitch the tent in the yard, check every stake and guy line, and confirm your pad holds air overnight. A slow leak found at home is an inconvenience. The same leak found at 11 p.m. on a remote ridge is a cold, sleepless night.
How to Pack a Backpack for Hiking Without Hot Spots
Learning how to pack a backpack for hiking comes down to one idea: put weight where your body carries it best.
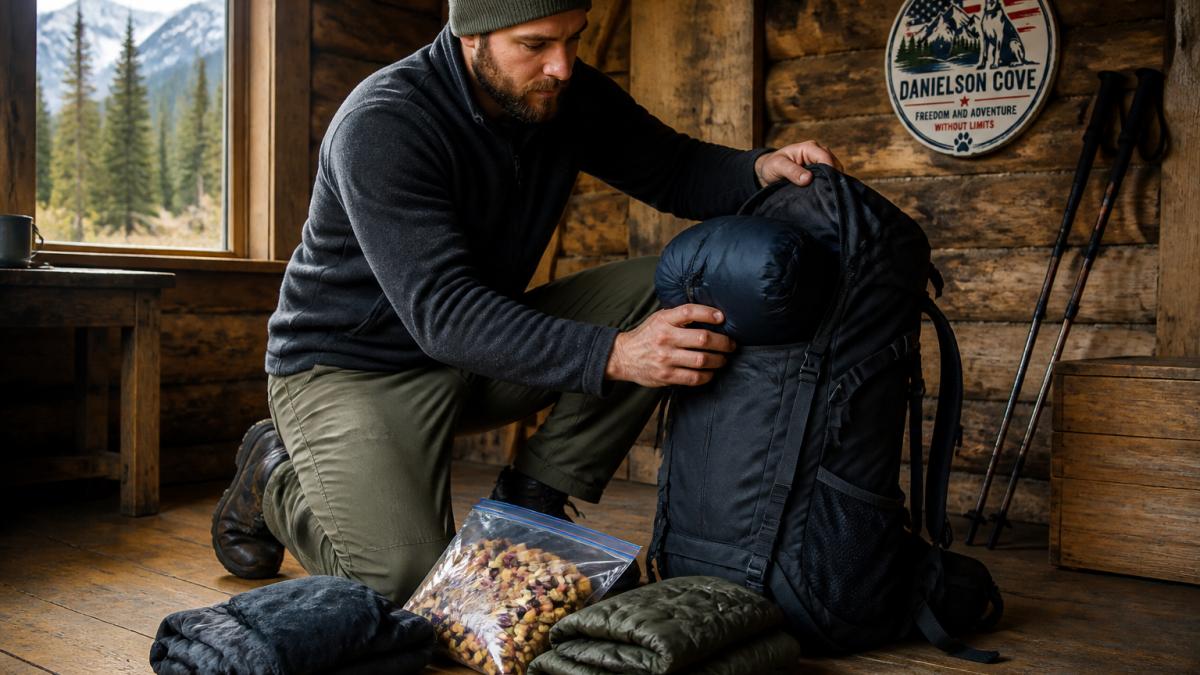
Hot spots come from movement, not just weight. If your load shifts with every step, the pack rubs and your shoulders and hips pay for it. A well-packed bag stays quiet and stable.
Weight Distribution by Pack Zone
Think of your pack in three zones:
- Top and center: heavy items like food, stove fuel, and water
- Middle, against your back: the densest gear, close to your spine
- Bottom: light, bulky items like your sleeping bag or spare layers
Keep day-use items, snacks, a map, rain gear, in the top lid or an outer pocket so you're not unpacking the whole bag every time you stop.
Your Multi-Day Hiking Packing List, Built by Category
A multi-day hiking packing list works best built by category, not as a flat list, categories help you spot gaps and cut duplicates. Here's how we'd group a remote-trip load.
| Category | Items | Why It Matters |
|---|---|---|
| Clothing | Base layer, insulation, rain shell, spare socks | Layers handle changing weather |
| Shelter | Tent, footprint, stakes, guy lines | Protection from wind and rain |
| Sleep | Bag, pad, liner | Warmth and rest after long days |
| Food and water | Meals, snacks, filter, bottles | Fuel and hydration without resupply |
| Navigation | Map, compass, headlamp | Route-finding when devices fail |
| Safety | First-aid kit, emergency blanket, repair kit | Handles injuries and gear failures |
Pack a compression bag for your sleeping bag or spare clothing and you'll reclaim real space. The Down Compression Outdoor Storage Bag uses 40D Silnylon Ripstop fabric, which resists moisture and tears, and it comes in sizes from 4L up to 35L to match your load.

Clothing Layers, Rain Gear, and Footwear
Build your clothing around three layers: a moisture-wicking base layer, an insulating mid layer, and a waterproof shell.
Bring one spare pair of socks per two days, plus rain gear you can put on without removing your pack. For footwear, choose boots you've already broken in, new boots on a remote trail are a blister waiting to happen.
Food and Water Math for Days Without Resupply
Food and water planning is where remote trips differ most from weekend hikes. Without a resupply point, you carry everything you'll eat and drink, so the math has to be right before you leave, it decides whether your pack is 35 pounds or 55.
Food: Calories Per Day, Then Add a Reserve
Plan around calories, not meals. A common backpacking range is roughly 2,500 to 3,500 calories per day, with the higher end for cold weather, big elevation gain, or long hours on the move.
14 in 1 Outdoor Emergency Survival And Safety Gear Kit →
To turn calories into weight, use calorie density. Freeze-dried meals, nuts, nut butter, oats, olive oil, and dried fruit typically land in the 100 to 150 calories per ounce range.
Water: Carry Capacity vs. Treatment Capacity
Water planning has two separate problems, and most people only solve one.
Carry capacity is how much water you can move between sources. Two one-liter bottles plus a collapsible reservoir is common.
Treatment capacity is how much water you can safely process per day, the number people forget. Treat every backcountry source before you drink it, even clear-looking water, Giardia and other pathogens don't announce themselves (the CDC).
Fuel Math for Cooking
If you're cooking, fuel is the third input. A common figure is roughly 0.5 to 1 ounce of canister fuel per person per day for simple meals. Cold weather, wind, and longer boil times push that toward the high end. Carry one extra day as a reserve, and check stove-canister compatibility before you leave.
A portable power bank keeps your phone, GPS, and headlamp charged on longer trips. The Outdoor Emergency Charging power bank has USB-C and micro-USB ports, so it can charge two devices at once, and its reinforced polymer casing stands up to rough handling in the field.

Wilderness First Aid Kit Checklist and Emergency Communication
A wilderness first aid kit checklist should cover cuts, blisters, sprains, and allergic reactions, plus the tools to signal for help. Remote trips mean longer response times, so your kit has to handle more than a day hike would, and your communication plan has to work when your phone doesn't.
Build the Kit Around Response Time, Not Item Count
Think in terms of what you can treat for 24 to 72 hours, the realistic window before help arrives on a remote route. Build your kit around these items:
- Adhesive bandages in several sizes
- Gauze pads and medical tape
- SAM splint or a rigid splint alternative
Pair the kit with a compact survival and safety set so your emergency tools live in one place instead of scattered across five stuff sacks. The 14 in 1 Outdoor Emergency Survival and Safety Gear Kit packs essential tools into one small kit, which makes it easy to grab under stress.
Communication: The Plan Matters More Than the Device
Satellite messengers and personal locator beacons work where cell service doesn't. Carry one on any remote route, and know its limits: most need a clear view of the sky and offer one-way or two-way messaging, not voice. A device without a plan is just weight.
A workable communication plan has four parts:
- A check-in schedule. Agree on specific times (for example, morning and evening) when you'll send a status message.
- A missed check-in trigger. Decide in advance what your contact does if you miss one check-in, and what they do if you miss two.
- A route share. Leave a written itinerary with someone at home: trailhead, route, campsites, expected exit date, vehicle description, and who to call if you're overdue.
- An emergency contact list. Include local search-and-rescue contacts for your route and the non-emergency line for the managing agency, not just 911.
Evacuation Planning: Decide Before You Need To
Know your exit routes before you start. Mark bailout points on your map and note where a road or trail crosses your route. If someone gets hurt, the fastest way out is often not the way you came in.
A simple decision framework helps under stress:
- Can the person walk? If yes, self-evacuate on the shortest safe route.
- Can the person be moved safely with assistance? Use a group carry or improvised litter only if you've practiced it and the terrain allows.
- Is the injury or illness life-threatening, or is movement unsafe? Stay put, stabilize, and trigger your emergency signal. Conserve battery and body heat.
Leave No Trace and Waste Management
Leave No Trace practices keep remote areas worth visiting. Pack out everything you bring in, including food wrappers, used tea bags, and hygiene items. Bury human waste according to local guidance, typically 6 to 8 inches deep and at least 200 feet from water, trails, and camp. Store food in a bear-resistant container or hang it where required, and check the Leave No Trace Seven Principles for current guidance before your trip.
At Danielson Cove, we build gear for people and their dogs who want to go further and stay out longer. Our Ultralight Carbon Fiber Five-section Folding Trekking Pole collapses small for pack travel and adjusts from about 24 to 54 inches, and our survival kit keeps your emergency tools in one place. Every purchase also supports our commitment to donate 15 percent of profits to Daisy's Dane Sanctuary, a Great Dane rescue near Kansas City.
Conclusion: Test Your Load Before the Trailhead
Remote wilderness trips reward preparation and punish guesswork. Weight targets, volume planning, and a tested load matter more than any single piece of gear.
At Danielson Cove, we build gear for people and their dogs who want to go further and stay out longer.
Load your pack, walk a few miles, and adjust before the real trip starts.
Frequently Asked Questions
How much food and water should you bring on a remote wilderness trip?
Plan roughly 1.5 to 2.5 pounds of food per person per day depending on effort and cold, and treat water on the move rather than carrying it all. On remote wilderness trips, carry one to two liters between sources plus a filter or purification backup, and cache or resupply only when the route allows. Food weight is the biggest variable on trips without resupply, so repackage meals and remove cardboard before you leave.
What should go in a wilderness first aid kit checklist?
Build your wilderness first aid kit checklist around wound care, blister treatment, pain and allergy medication, tweezers, trauma shears, gloves, and an emergency blanket, plus any personal prescriptions. Add a repair kit for gear and a way to signal for help. Check expiration dates on medications and adhesive products each season, and keep the kit in a waterproof bag near the top of your pack so it is reachable without unpacking everything.
How do you pack a backpack for a remote hike so it stays comfortable?
Put the heaviest items, like food and water, in the middle of the pack close to your spine, keep the sleeping bag at the bottom, and store frequently used gear in the lid or side pockets. Tighten the hip belt first so it carries most of the load, then adjust shoulder straps and load lifters. Learning how to pack a backpack for hiking comes down to balance: a centered load moves with you instead of pulling you backward on descents.
What backcountry camping essentials do people forget most often?
Headlamp batteries, a repair kit, and a backup water treatment method top the list. Many hikers also skip emergency layers and a paper map and compass when they rely on a phone. Backcountry camping essentials should cover shelter, sleep, water, food, navigation, first aid, and communication, with at least one backup for anything your trip depends on. Test every item at home before you trust it on a remote route.